Sweet Souffle, Savory Souffle


Okay, first things first. I know that “souffle” should actually be “soufflé”, but I can’t be bothered to type out “é” every single time I write souffle, so it will be souffle all the way down. Feel free to pronounce it “sooh-ffull” instead of “sew-flay” if you like.

Souffle is a kind of fluffy puffy egg custard dish. Fluffy and puffy, kind of like how you would become if you ate too many souffles. Many recipes I researched began with the caveat “souffles are known for how difficult they are to make, but actually, they’re easy!” That’s true to some extent. I failed in souffle making twice before I finally got it down. Once it was down, it’s fairly easy. As with all tricky dishes, there are a few key details that you should pay attention to, but as long as those details are taken care of, everything else is fairly forgiving.

Also, if this is your first time making souffles, I recommend that you try the chocolate recipe first. It is simpler, uses less ingredients, and will save you extra frustration if you need to try the recipe multiple times.

Before you begin, you WILL need an electric mixer (hand held is fine), and a few straight-walled ramekins. The recipes are made for 6 oz ramekins.

Case I: Chocolate Souffle

Thanks to practice, I no longer have trouble

Thanks to practice, I no longer have trouble “getting it up” when I need to.

Adapted from “The Joy of Cooking” cookbook
Cook & Prep Time: 30 minutes
Serves 3
Ingredients:

2 fresh eggs
3 oz semi/bitter-sweet chocolate
3 tbs butter + more for buttering ramekins
1 tbsp rum, coffee, or water
2 tbs sugar + 2 tbs sugar*
1/4 tsp cream of tartar

*If you have castor sugar (ultrafine) or powdered sugar, use that instead. Granulated sugar will also work. More details below on the practical differences.

Cooking

Begin by separating the yolk from the whites of the eggs. Keep each in their own separate container. You will need both but at different times. Heat a medium to large-sized pan or pot of water to just below simmer. You want the water to be hot, but not simmering. Preheat your oven to 375F (190C).

Try doing this with a human period, huh? Chickens are clearly superior in this aspect.

Try doing this with a human period, huh? Chickens are clearly superior in this aspect.

Combine the three tablespoons of butter, rum, and chocolate in a small bowl. Hold the bowl over the hot water and whisk until everything is silky and combined. Try not to let the bowl touch the water. Once everything is melted and combined, set the chocolate aside to cool for ten minutes.

COVER YOUR EYES CHILDREN! THIS ISN'T WHAT FOOD SHOULD LOOK LIKE!

COVER YOUR EYES CHILDREN! THIS ISN’T WHAT FOOD SHOULD LOOK LIKE!

Bring your bowl of egg whites over the hot water for a minute or two, swirling the contents so as to not cook the whites. You want to sort of bring the whites to room temperature-ish before beating it. When the chocolate has been cooling for 5 minutes, start beating your egg whites. Beat it on medium until it is foamy. Add the cream of tartar. Beat until soft peaks, and then slowly drizzle in your sugar. The less fine your sugar, the slower you should drizzle it. If you have granulated sugar, you want to add the two tablespoons over the course of an entire minute so as not to kill the foam. You are basically making a meringue, which forms the foamy structure of the souffle.

Like light, puffy, sweet clouds, with a small chance of salmonella.

Like light, puffy, sweet clouds, with a small chance of salmonella.

Continue to beat your meringue on medium until it has formed stiff (but not dry) peaks. Use a rubber spatula to move 1/3 of this meringue mixture into the container with melted chocolate and stir to combine. Dump the chocolate/meringue mixture back into the bulk of the meringue and fold everything together, being gentle so as not to kill all the air bubbles that were beaten into the egg whites. Brush the insides of the ramekins thoroughly with softened butter and dust the insides with sugar (again, castor sugar is preferred, but granulated is fine). Fill each ramekin to the brim with the chocolate mixture and swipe off any excess with a straight-edged utensil. Run your thumb along the inside rim of the souffle to carve out a shallow valley around the edge; this will allow your souffle to rise straight up (credit to Gordon Ramsay for this method). Bake for 10 minutes.

It's brown mesa, Black Mesa's edible and less dangerous cousin.

It’s brown mesa, Black Mesa’s edible and less dangerous cousin.

Top with chocolate shavings and/or whipped cream if available. Serve immediately. Souffles do not keep and will deflate very quickly after cooking, so plan accordingly.

Case II: Spinach, Shrimp, and Gruyere Souffle

They call me puff daddy.

They call me puff daddy.

Prep & Cook time: 45 min
Serves 2

Ingredients:

2 fresh eggs
1.5 tbs all-purpose flour
1.5 tbs butter, plus more for brushing
3/4 cups milk
1/2 tsp white pepper
1/2 tsp nutmeg
salt
3-4 medium-sized shrimp
1 cup raw spinach, packed
4 tbs gruyere cheese, grated*
2 tbsp cooking oil
3 tablespoons bread crumbs

*Yeah yeah it’s “gruyère” I know.

Cooking

The process begins a lot like the sweet souffle: separate your egg whites and yolks and reserve both. Place your butter into a small pot over medium-low heat. Melt the butter, taking care not to let it brown. Add your flour.

This is like, food porn as in the food version of porn that features your grandma. Just a friendly reminder that not all porn is created equal.

This is like, food porn as in the food version of porn that features your grandma. Just a friendly reminder that not all porn is created equal.

Generally speaking, most savory souffles follow a very simple guideline: cheese and egg yolks are stirred into a bechamel sauce which is in turn combined with a meringue along with whatever solid food objects, which is then baked in a similar fashion as a sweet souffle.

Cook the flour and butter for a while, being careful not to let it brown. If anything starts to turn brown or yellow, turn the heat down and remove the mixture from heat temporarily to cool it down. After a few minutes, slowly whisk in the milk. Let cook for 3-4 more minutes until the mixture thickens. Add nutmeg and white pepper, set aside to cool for about ten minutes.

If we use the Louis C.K. analogy of the Cinnabon being the

If we use the Louis C.K. analogy of the Cinnabon being the “fat faggot treat“, this would be the hot cum.

Heat another saute pan on high heat. Add your cooking oil. When the oil begins to smoke, saute your spinach until cooked, about a minute. Remove from heat and set aside to cool. Add your shrimp (chopped into tiny pieces beforehand) and saute until just cooked, about 30 seconds. Remove from heat. Pre-heat your oven to 350F (176C).

When the spinach is sufficiently cooled to handle, squeeze the juice out of it and chop into small pieces. Set aside. Now, take out your gruyere and either grate or finely chop 4 tablespoons. Add both the cheese and the egg yolks to the bechamel while stirring rapidly. The stirring will help ensure your egg yolk does not cook upon touching the bechamel. Stir until the cheese is melted.

Do you see that fucking pricetag? Ugh. Real imported gruyere. I spent like 5 minutes just standing in front of the cheese section thinking about it before buying the smallest block I could find. Traumatized for life.

Do you see that fucking pricetag? Ugh. Real imported gruyere. I spent like 5 minutes just standing in front of the cheese section thinking about it before buying the smallest block I could find. Traumatized for life.

Now start beating the egg whites for the meringue. This time, add nothing except a pinch of salt once the meringue has reached soft peaks. Beat until stiff. Add 1/4 of this mixture to the bechamel. Mix to incorporate. Then, dump the bechamel back into the meringue along with the spinach and shrimp. Fold to incorporate. Brush the inside of two ramekins with softened butter and dust with bread crumbs.

You can also use grated parmesan. I don't have parmesan.

You can also use grated parmesan. I don’t have parmesan.

Pour the batter in, swipe the excess off the top with a flat utensil, and make a valley around the rim with your thumb as per the sweet souffle. Bake for about 18 minutes, until souffle has risen and is golden brown on the top. Top with shaved cheese and serve immediately.

Eat too many of these and you might souffle off your mortal coil.

Eat too many of these and you might souffle off your mortal coil.

Conclusion
Before I started this project, I remember thinking “who in the world would ever make a savory souffle? Well, in reality the savory souffle is just as good (if not better!) than the sweet souffle. It is warm, rich, creamy, and the light texture completely masks how heavy the dish actually is until you realize that you are suddenly full from having eaten such a small dish. A master stroke dish that is perfect as the first course of a three course meal.

Seared Salmon Benedicts


Almost nobody hates eggs benedicts. I was going to say “nobody” period, but Google search turns up 27 results for “I hate eggs benedict”, which means there are at least 27 people out there who suck and don’t count. The rest of the population of the world is then split into two categories: people who love eggs benedict, and people who haven’t had it but want to try. Up until yesterday I was in the latter category of people. But no more! It is definitely a dish everyone should try at least once in their lifetime.

Eggs benedict are a sort of super project for people who love to cook and are still learning how. It teaches you how to clarify butter, how to make hollandaise sauce, and how poach eggs; all very useful tools for many other dishes.

Ingredients

Serving someone eggs benedict - useful for when you're trying to give someone heart disease and still have them think they like you the entire time.

Serving someone eggs benedict – useful for when you’re trying to give someone heart disease and still have them think they like you the entire time.

Cooking + Prep time: 1 hour
Serves Two*

6 eggs**
2 1/2 sticks butter + 2 tablespoons, OR 1 cup clarified butter + 2 tablespoon unclarified butter
1 English muffin
1 tbsp water
2 tsp lemon juice
1 tsp salt
1 tsp ground white pepper
2 four-ounce (120g) portions of salmon
1 tsp cayenne pepper (optional)
1 tbsp finely chopped parsley (garnish, optional)

*There is enough hollandaise in this recipe for 20 benedicts. Take this into consideration when scaling the recipe for a large crowd.
**You will need four yolks plus two whole eggs. Use the freshest eggs possible for best results in terms of both taste and cooking.

Cooking

Clarified butter is (probably, I never actually checked) available for purchase at your local grocery store. However, if you, like me, don’t have any, you will have to make some yourself. Take a small pot and place it over the stove at the lowest heat you can manage. Place your sticks of butter into the pan and let them melt.

They're melt their way into your heart, then clog it up and kill you.

They’re melt their way into your heart, then clog it up and kill you.

After 20-30 minutes, you will have a layer of white scum floating atop a pool of piss-colored oil (poetry was never my strength). Use a spoon to scoop the stuff off the top. Then, if you have a cheese cloth, pour the melted butter into a container covered by the cheese cloth. Otherwise, do your best to siphon out as much of the white solids as you can.

A Chinese man will tell you this represents Yin and Yang in perfect balance. A Frenchman will tell you the Chinese man is lying, you should scoop out that white shit because it's ruining your ability to make a good hollandaise.

A Chinese man will tell you this represents Yin and Yang in perfect balance. A Frenchman will tell you the Chinese man is lying, you should scoop out that white shit because it’s ruining your ability to make a good hollandaise.

Now, crack four eggs and separate the yolks out into a glass or metal bowl. Bring a pot of water to a bare simmer. Whisk the yolks until they are slightly paler in color and a bit foamy. Meanwhile, prepare your lemon juice and have your clarified butter in a pourable container within easy reach. You will need these ingredients in short order soon.

Start by whisking the egg yolks by themselves over the pot of barely simmering water. The bowl of egg yolks should benefit from the heat of the water, but the bottom of the bowl should not touch the water. Then, add a small amount of butter into the egg yolks and whisk to incorporate. Each time the butter is incorporated, add another bit of butter, in slowly increasing amounts, until all the butter has been whisked into the egg yolk. The sauce should start to thicken slightly. Add lemon juice, salt, pepper, and cayenne pepper (optional). Whisk to combine, then take it off heat.

You could probably make this sauce look really nice by having good lighting and some fancy shaped porcelain container as its receptacle, set on a table with a clean patterned tablecloth overlooking an open window that shows the house is situated near a cliff with a view of the blue ocean. And maybe a pretty girl with lovely breasts is standing next to the table wearing a summer dress. If a picture is worth a thousand words this caption would really have to be really really long in order to be its equal.

You could probably make this sauce look really nice by having good lighting and some fancy shaped porcelain container as its receptacle, set on a table with a clean patterned tablecloth overlooking an open window that shows the house is situated near a cliff with a view of the blue ocean. And maybe a pretty girl with lovely breasts is standing next to the table wearing a summer dress. If a picture is worth a thousand words this caption would really have to be really really long in order to be its equal.

Now, either using the same pot of water or a separate pot, keep (or bring) the water to/at a bare simmer and add a splash of vinegar. Slice your English muffin in half lengthwise and begin toasting it. Heat up two tablespoons of butter in a non-stick pan over high heat. When the butter in the pan stops bubbling, add the salmon. You want to sear it quickly on both sides to give it a bit of brown without overcooking the fish, about a minute or two on both sides depending on the power of your stove.

One smells like fish, is soft to the touch, and is pink and moist, the other is a fillet of salmon.

One smells like fish, is soft to the touch, and is pink and moist, the other is a fillet of salmon.

Have two eggs on hand. When the pot of water comes to a bare simmer, crack the eggs and gently release them into the water as close to the water as you can. Do not disturb the water while cooking. Let the eggs cook for about 4 minutes, or until the whites are cooked and the yolk is still runny. Gently lift the eggs out of the water and trim off the excess ribbons of white from the main mass.

The asparagus in this meal is like the diet coke in a Big Mac combo meal, it keeps things healthy.

The asparagus in this meal is like the diet coke in a Big Mac combo meal, it keeps things healthy.

Assemble your benedicts: place half an English muffin as the base, a piece of salmon, then the poached egg on top. Generously spoon (but do not drench) hollandaise onto each benedict. Serve immediately.

The general rule about hollandaise is that it should be used (or frozen, according to some sources) within two hours of creation, before the raw egg yolks become a health concern. Plan accordingly if you are serving to many guests for an occasion.

The Result

Might as well spread the love.

Might as well spread the love.

I had a mouth orgasm on the first bite. That is all.

Conclusion

Sorry about the photos, they did not come out as well as I thought they would. Maybe I can try cooking at an earlier time when the lighting is better. But it was certainly one of the best dishes I’ve had in recent memory. Try it sometime, you or whoever you make it for won’t be disappointed.

Sauteed Gnocchi with Basil Pesto


Imagine that you are a bird. You are flying in the air, free as can be, when you spot a delicious morsel of bread sitting on a table inside a building, just waiting for you to snatch it up. You veer to the left and begin your smooth descent towards that bread. And just when it is two feet away, WHAM! You smash into an invisible wall and die a horrible death.

Anyways, that was an accurate metaphor for my first experience trying to learning Italian cuisine. I keep hearing Italian chefs talk about focusing on “simplicity” and “keeping things simple”. But as soon as you try out that “simple” recipe with the 5 ingredients it kicks you right in the balls and your own creation turns out nothing like it’s supposed to be. Both gnocchi and pesto are simple recipes with a short list of ingredients, yet if you wish to make them well, the procedures are thoroughly nuanced and difficult to master.

Ingredients

Most people try to spend as little time as possible cooking as much as possible. I spend as much time as possible cooking as little as possible, then microwave up a frozen pizza later to make up for the deficit. Something is wrong here.

Most people try to spend as little time as possible cooking as much as possible. I spend as much time as possible cooking as little as possible, then microwave up a frozen pizza later to make up for the deficit. Something is wrong here.

Prep + Wait time: 2-3 hours

Gnocchi recipe by Thomas Keller. Basil recipe from here.

Basil Pesto:

1 1/2 – 2 cups fresh basil leaves, loosely packed
3 cloves garlic
1/4 cup pine nuts
1/2 cup freshly grated Parmesan, loosely packed
~1 cup olive oil

Gnocchi:

2 lb russet potatoes (roughly 3.5 medium potatoes)*
1 tbsp salt
1 + 1/2 cups all-purpose flour
3 egg yolks

*Russets are recommended by most recipes. They are the cheapest brown potatoes in American supermarkets. Yukon gold is an acceptable substitute.

A dough scraper is highly recommended for making gnocchi.

Cooking

Pre-heat your oven to 350F (175C). Pop your potatoes in for 1-2 hours, depending on size (2 hours for large, 1 hour for medium). Flip them every half-hour until thoroughly cooked. Crack 3 eggs and separate out the yolks. Leave the yolks outside to warm at room temperature. Meanwhile, make basil pesto.

We're in for some chop.

We’re in for some chop.

We are going to hand chop the basil pesto. Apparently it’s supposed to turn out with a better texture or whatever, but here is my personal reasoning about the process. Ideally, a sharp knife is sharper than a food processor’s blade, and will bruise the herb leaves less as it slices through the basil. Italians have a special moon-shaped knife called the [url=http://images2.wikia.nocookie.net/__cb20121231130904/wowwiki/images/d/d9/Illidan.png]mezzaluna[/url] that allows you to easily slice through herbs with minimal bruisage. While you can replicate this process with a regular knife by rocking the knife through the herbs instead of chopping straight down, the process becomes extremely time consuming. Ultimately, bruising will occur and the basil itself will not be hugely improved from what comes out of a food processor.

This is, coincidentally, also how the Amish make pesto.

This is, coincidentally, also how the Amish make pesto.

In any case, ri0nse and pat dry your basil, and pick the leaves from the stems. Pile your ingredients into neat piles where you can access them easily. Start by chopping a third of your basil along with your garlic. When this is a fine mince, add a third of your pine nuts and continue chopping. Then, at approximate three minute intervals, add a third of your shaved parmesan, a third of the basil, another third of the pine nuts, then cheese, then basil, then the last of your pine nuts, and the last of the parmesan. Chop until you have a very fine mince on the last batch of pine nuts and parmesan cheese.

If you add urine it becomes pissto, a unique beverage favored by Bear Grylls.

If you add urine it becomes pissto, a unique beverage favored by Bear Grylls.

Add olive oil and mix. Store in the refrigerator until ready to use. Go play outside until the potatoes are done. When the potatoes are cooked, take them out of the oven. While hot, cut them in half and scoop out the insides onto a clean work surface. Ideally you want at least 4 square feet of work surface, or about 0.66 square meters. Mash the potatoes until they are lumpless, using a potato ricer if available. Make a ring with the hot potatoes and a well in the middle. Sprinkle half a cup of flour into the well. Dump onto the flour (NOT onto the hot potatoes! they will cook the yolks instantly) the three yolks, then the second half cup of flour on top of the yolks. Now, working as fast as possible, mix everything together into a homogenous mass. If you do it fast enough the dough will not be too sticky to work with, If it is very sticky, sprinkle flour around.

If you balk at the idea of using so many yolks, some recipes recommend using whole eggs. Try one and a half eggs as a substitute. Some people just can't take a yolk.

If you balk at the idea of using so many yolks, some recipes recommend using whole eggs. Try one and a half eggs as a substitute. Some people just can’t take a yolk.

Divide your dough into fourths. Sprinkle flour onto your work surface and prepare a sheet pan, either dusted with flour or lined with parchment paper. Roll a fourth of dough out into a long roll close to an inch thick, or about 2 cm. Use your dough scraper to divide the roll into sections of dough about 3/4 of an inch or 2 cm in length.

I'll show you a real tunnel snake.

I’ll show you a real tunnel snake.

Now to shape the gnocchi. I didn’t quite understand how to shape them while I made these gnocchi, but here is the proper way to shape them with a fork: Press the section of dough gently into the fork to flatten the gnocchi while creating an indentation on the reverse side, then roll the gnocchi into a roll shape with the indentation on the outside. They should look like tiny rolls with ridges on the outside.

Yeah thanks Youtube you were a real fucking help. I've been doing it wrong all this time. I AM A FAILURE!!! *Runs off a cliff*

Yeah thanks Youtube you were a real fucking help. I’ve been doing it wrong all this time. I AM A FAILURE!!! *Runs off a cliff*

Anyways, you are ready to cook! Bring a big pot of water to a boil, generously adding a large amount of salt and oil (1/3 of a cup of each per gallon of water or so). Place 2 tablespoons of butter into a non-stick pan, but do not turn on the heat yet. When the water comes to a boil, add the gnocchi to the water and turn on the heat to your pan at the same time. The gnocchi will take about 2 minutes to cook. When they float to the surface, wait 20 seconds and they are done. The butter in your pan should be nice and hot by then. Scoop the gnocchi out of the pot of water and into your pan. Saute, letting the gnocchi get nice and brown.

You can just serve after boiling, but this is just because Italians really aren't getting enough grease in their diet.

You can just serve after boiling, but this is just because Italians really aren’t getting enough grease in their diet.

When the gnocchi is nicely browned spoon some pesto onto them and mix together. Serve immediately.

The Result

Yeah motherfucker. Someone eating this might think you spent a summer vacationing in Italy or learning from an Italian grandmother, but only YOU know the truth. You sat on your ass and read this blog, like an unsung hero would.

Yeah motherfucker. Someone eating this might think you spent a summer vacationing in Italy or learning from an Italian grandmother, but only YOU know the truth. You sat on your ass and read this blog, like an unsung hero would.

People have described gnocchi as “light, fluffy pillows”, but that’s really too flattering. They’re kind of like… potato-y dumplings. Still, when fried up they are quite nice. Crispy on the outside, with a fluffy potato texture on the inside. The pesto adds a nice touch of aromatic flavor that brings it all together. Not the best dish ever, but certainly something nice to have tried and said that you have tried. Veni, vidi, vici.

Crispy Fish Cakes


Crispy fish cakes? Is there any other type of fish cake? Well there are, just not edible ones. I just needed to pad out the title with an attractive adjective so people will read this blog. Did I getcha? Good.

Wait! Don’t run away! What I’m technically going to show you is “chipotle fish cakes with mango pico de gallo”. It actually tastes pretty good. Much better than the frozen pizzas and hot pockets I’ve been eating in between being too lazy to cook. And probably better than that raw, half-frozen drumstick you’re gnawing on right now too, since that was all that’s left in your fridge on a Wednesday night and you can’t be arsed to go out into the cold after a hard day’s work to buy real food.

This shit is legit. Buy the ingredients over the weekend and spend a couple of hours to make something nice.

Ingredients

A lot of people don't seem to like fish. That's because they suck.

A lot of people don’t seem to like fish. That’s because they suck.

Total Prep & Wait Time: 2 hours
Serves 2-3

Fish Cakes:
1 lb boneless fish fillets*
2 tbsp chipotle mayonnaise or spread**
3 tbsp scallions
4 tbsp cilantro, parsley, or dill
1 tbsp minced red pepper***
2 tbsp minced celery
3 tbsp shredded parmesan cheese
1 garlic clove, minced
1 tbsp salt
1 tsp pepper
1/2 beaten egg
2-8 tbsp panko bread crumbs
1 tbsp butter
1 tbsp cooking oil
1 1/2 cups panko, for coating

Mango Pico:
1/2 large ripe mango
1/2 medium yellow onion
4 small or 2-3 medium tomatoes
1 large lemon
1/2 tbsp salt
1 tsp pepper
3 tbsp cilantro (fresh coriander)

*Can be any white-meat fish, salmon, or crab meat
**Any chipotle flavored mayonnaise or spread can do. Lacking that, you can try using ranch or a mayonnaise and mustard combination.
***I used green because red is currently prohibitively expensive where I live. Red is more flavorful and adds better color.

Cooking

For once we can start with cooking before prep. Get all your ingredients out and have your fish on hand. Add oil and butter to a pan over medium-high heat. Melt the butter and let the large bubbles dissipate. Cook the fish until it is just done, salt and peppering it on both sides. Place the cooked fish into a large bowl and set aside. Reserve the pan and the oil.

Allegedly, Osama Bin Laden is sleeping with the fishes nowadays. In a few years, we fish eaters may all have a small piece of Bin Laden in us. Think happy thoughts.

Allegedly, Osama Bin Laden is sleeping with the fishes nowadays. In a few years, we fish eaters may all have a small piece of Bin Laden in us. Think happy thoughts.

As the fish is cooking, get out your small tidbits of vegetables (scallions, celery, garlic, and pepper) and mince them. The pieces should be about 1/8 of an inch or 1/3 cm in size.

If eating things that eat things that eat decomposing human beings is the cycle of life, then Soylent Green is just cutting out the middleman. Or middleanimal, as it were.

If eating things that eat things that eat decomposing human beings is the cycle of life, then Soylent Green is just cutting out the middleman. Or middleanimal, as it were.

Saute the vegetables in the same pan as the fish for about five minutes, until softened. Place them into the bowl with the fish. Add all of the other ingredients except bread crumbs. Add 2 tablespoons of breadcrumbs and mash everything together. You want to break up all of the fish into very small pieces, but not completely mashed.

For a group of people who don't like cannibalism, Americans sure love zombies.

For a group of people who don’t like cannibalism, Americans sure love zombies.

Ideally at this point, your mixture should be dry enough to form into cakes with only 2 tablespoons of bread crumbs. However, depending on the moisture of the fish, this may not be the case. Add bread crumbs a tablespoon at a time until you can just form 4-8 delicate cakes. Try to use as little bread crumbs as possible. (For reference I used about 5 tablespoons and came out with 6 cakes)

Dump 1 1/2 cups of panko bread crumbs into a container and use them to coat your fish cakes. Set the cakes aside. When all the cakes have been formed, pour all of the remaining bread crumbs on top of the cakes to coat them and prevent them from drying out. Refrigerate for at least 1-2 hours to allow cakes to firm up before cooking.

Not that I endorse cannibalism, just observing how things turned out regarding this topic while showing you how to make food. You are what you eat and all that, right?

Not that I endorse cannibalism, just observing how things turned out regarding this topic while showing you how to make food. You are what you eat and all that, right?

Right! As the fish cakes refrigerate, we can move on to the pico. Pico de gallo is very easy to make, delicious, and refreshing. It is an excellent relish that goes along with many savory dishes. Gather together all the fruits and vegetables you need, and a container to hold the pico.

Just think of this as an awkward conversation I'm having with myself that you can't help but overhear.

Just think of this as an awkward conversation I’m having with myself that you can’t help but overhear.

Small dice your tomato, mango, and onion. Place them into the container. Roll your lemon around while applying pressure to help loosen up the juices. Cut it in half and squeeze the juice into your pico. Be careful with the lemon! If it has seeds in it, you should squeeze the juice into another container and do something about the seeds before adding the juice into the pico. Roughly chop your fresh cilantro and add it to the pico. Add salt and pepper to taste, then refrigerate the pico to let it marinate together.

Look at the pretty colors! If you're colorblind, that last sentence probably didn't mean much to you.

Look at the pretty colors! If you’re colorblind, that last sentence probably didn’t mean much to you.

When the fish cakes are ready to cook, bring them out. Heat equal parts 2 tbsp butter and 2 tbsp oil in a non-stick pan over medium heat. Cook the fish cakes for about 4-5 minutes per side, until golden brown. Serve immediately with pico on the side.

The Result

Anyways, forget about all the cannibalism talk earlier. God only knows how many parts of dead babies, grandmas, and other human beings you've indirectly ingested.

Anyways, forget about all the cannibalism talk earlier. God only knows how many parts of dead babies, grandmas, and other human beings you’ve indirectly ingested.

Wow, right? These actually turned out way better than I expected. They’re crispy on the outside, and filled with savory, juicy fish on the inside. The chipotle adds a ton of flavor while the pico de gallo is a perfect pairing. I’m completely gushing right now, but probably only because I haven’t cooked anything this good in a while. There’s no shame in that. It’s good stuff, and very easy to make. If you like fish, or if you don’t dislike fish, you owe it to yourself to try this.

Bootleg Snickers


Bootleg? That’s right, but not illegal. The thing about food is that there isn’t really such thing as piracy. In fact, people (even chefs of famous restaurants) actually share many of their recipes with the world, and you can freely recreate the exact dish provided the resources and skill. Of course, not all recipes are shared, especially branded mass-marketed foods such as Snickers. The recipes for these types of food (and others like it such as Coca Cola) are very closely guarded secrets. That’s where some unscrupulous (and Chinese) bastard such as myself comes into the picture. This isn’t an exact recipe for Snickers per se, but a close approximation that is good and easy to make to boot.

Ingredients

Unfortunately my recipe doesn't include exotic ingredients such as calcium benzoate or xanthene gum or whatever the fuck the real Snickers has. Feel free to add it on your own time though.

Unfortunately my recipe doesn’t include exotic ingredients such as calcium benzoate or xanthene gum or whatever the fuck the real Snickers has. Feel free to add it on your own time though.

Prep and Wait time: 2 hrs
Serves Many

You will also need: two pots, one of them NOT non-stick, a wooden spoon or chopsticks, a sheet pan, parchment paper.

1 1/2 cups white granulated sugar
2 cups (1 12 oz bag) semi-sweet chocolate
1 12 oz can of roasted peanuts
2 tbsp vegetable shortening (not shown in pic)*
1 tsp salt
1 tsp vanilla extract
1/2 cup cream
3 tbsp water

*Vegetable shortening only. Do not replace with any other type of oil such as butter or lard or vegetable oil.

Assembly

If you have read any of my other blogs, you’ve probably seen me make caramel a couple of times. Well, here it is again! There’s a new trick this time though, if your sugar is dry and clumped together like mine is. Dump the sugar along with the lumps into your pot, and add just enough water to break up the lumps over medium heat. This will allow you to break all the sugar down into a homogenous mixture.

If you dip your peanuts in now all you'll get is a hot sticky mess. Wait... let's try that one again. Basically, you want to hold off on the peanuts.

If you dip your peanuts in now all you’ll get is a hot sticky mess. Wait… let’s try that one again. Basically, you want to hold off on the peanuts.

Bring the sugar to a boil and boil it down. Eventually it will be come transparent, and then start to brown. As the sugar boils, prepare another small pot and bring your cream to a simmer. You will eventually pour the cream into the sugar, and since the sugar is extremely hot, you want the cream to be hot also to avoid crystallizing the sugar instantly.

That sugar, it just caramelts in the pot. But don't try to taste it, or it will caramelt through your mouth and burn a hole in your tongue.

That sugar, it just caramelts in the pot. But don’t try to taste it, or it will caramelt through your mouth and burn a hole in your tongue.

If your caramel is darkening too quickly, take it off the heat to slow the cooking. Add salt and vanilla to the caramel at this time. Once the caramel has reached a deep amber, take it off the heat. Hold the small pot of cream in one hand and a wooden utensil in the other hand (I used chopsticks). Stir the caramel in a circle vigorously while pouring the cream into the caramel. Be sure to keep your hand to the side as you stir, as the steam rising out of the pot of caramel is VERY hot. You should end with a creamy looking caramel.

Now, dump your entire package of peanuts into the caramel. Mix. Prepare a sheet man lined with parchment paper. Pour the caramel/peanut mixture into the sheet pan. Stick the sheet pan somewhere cool, such as the refrigerator or the freezer, for at least an hour (an hour in the freezer, longer in the refrigerator).

This is actually quite good as is. It's like a Snickers bar if you licked the chocolate and caramel off first.

This is actually quite good as is. It’s like a Snickers bar if you licked the chocolate and caramel off first.

Once the peanuts are cooled, dump the entire thing onto a cutting board and peel off the parchment paper. Reserve the sheet tray and parchment paper, you will need it later. Cut the peanuts into bite-sized pieces, or however large you would like the pieces to be.

Prepare your chocolate by placing 4/5ths of it into a microwave-safe bowl along with the vegetable shortening. Microwave on high at 30 second intervals for about 2 minutes total to melt the chocolate. Stir. The shortening thins the chocolate out a bit, allowing you to get a thinner coating on your peanuts.

If you're one of those poor bastards allergic to peanuts and/or chocolate, read on, there is something for you at the end! But you are still a bastard.

If you’re one of those poor bastards allergic to peanuts and/or chocolate, read on, there is something for you at the end! But you are still a bastard.

When your chocolate is smooth and melted, stir in the remaining, unmelted chocolate. This allows you to “temper” the chocolate a bit so that when it resolidifies it will melt at a much lower temperature than it would otherwise. Ideally, professional candy makers would keep melted chocolate between 88-89F for optimal tempering, but that is extremely difficult to do at home. This substitute method is not as good, but easily executed at home.

Turds.

Turds.

Now, dip your cold candy pieces into the warm chocolate with your fingers, wiping off excess chocolate, This is a bit difficult because the candied peanuts soften in the warm chocolate, but you should be able to persevere. Once all the pieces are coated and on the sheet tray again, cool them for a second time for about half an hour in the freezer, or longer in the refrigerator. Then, store in a container for future consumption.

How do these taste? I actually made them a while ago, so it's all a blur.

How do these taste? I actually made them a while ago, so it’s all a blur.

The End…..?

Extra Stuff: Blueberry Vodka

These blueberries weren't eaten, but they were still in high spirits nonetheless.

These blueberries weren’t eaten, but they were still in high spirits nonetheless.

What? Two recipes for the price of one? Unheard of! Who does this kind of shit? Anywho, blueberries were on sale a few weeks ago, and what better to do with blueberries than to infuse a bottle of vodka? Here’s what you will need:

1 750 ml of decent quality vodka
2 cups blueberries

First, pour about 1/3 of the bottle of vodka out. Use that however you like. Then, make a small cut in each blueberry (yes, it’s tedious, but if you do it while drinking the vodka it’ll all pass quickly. You won’t even remember it in the morning). Deposit all of the nicked blueberries into the bottle, and store somewhere dark for two weeks. Shake the bottle vigorously at the end of the first week.

After two weeks, prepare a few coffee filters and filter the blueberries out of the vodka.

Thanks to the antioxidants in blueberries, it's bad for your liver but prevents cancer. So it's like chemotherapy in a bottle.

Thanks to the antioxidants in blueberries, it’s bad for your liver but prevents cancer. So it’s like chemotherapy in a bottle.

Pour the vodka back into the bottle (or down your gullet) and store in a cool place. Enjoy!

A gift for a friend.

A gift for a friend.

The Result

Here is finally a self-contained food blog: there is something to eat, and something to drink. Why, you could even call it a meal, if you’re still in your teens or are on a destructive path to gastronomic suicide. If the bootleg snickers are too complicated for you, at least try the vodka. It’s worth the wait. Hell, buy two bottles if you can’t wait. Drink one bottle while the other marinates.

Borscht


Borscht! What an interesting dish, right? Whenever some TV cook pulls an exotic dish out of his or her ass, it usually comes off the tail of a trip to some foreign land where they acquired the taste for such dish, or maybe a recipe was handed down to them by a grandma of a friend who lived in said land for 87 years. Not me. I was sitting on my ass, as usual, browsing Wikipedia, and came across this.

Anyways, it’s not the journey that matters, it’s the result that makes you sit here and read this blog, right? Borscht is a healthy, hearty, easy soup made with red beets. Due to its diverse origins in about a dozen Eastern European countries, the ways to make borscht are near infinite. This is just one such variation that I’ve cobbled together from several recipes.

Ingredients

This is just most of the ingredients. Read the list for all of them. Or if you're feeling plucky, proceed blindly off of this picture alone. What's the matter, chicken?

This is just most of the ingredients. Read the list for all of them. Or if you’re feeling plucky, proceed blindly off of this picture alone. What’s the matter, chicken?

Total time: 1 1/2-4 hours
Serves 4-8

Beef Stock*:
~1 lb raw beef bones, tendons, etc.
1 yellow onion
1 carrot
1/2 tsp thyme
1/2 tsp rosemary
2 bay leaves
2 cloves garlic
1 tbsp fresh or dried parsley
1 tbsp vegetable oil

Borscht:
4 cups beef stock
5 tbsp tomato paste
1/2 medium head of green cabbage
1 yellow onion
1 large carrot
3 medium beets**
3 medium or 4 small potatoes
salt
pepper
2 tbsp vegetable oil
3 tsp red wine vinegar
3 tbsp fresh parsley
2 bay leaves
3 cloves garlic
sour cream or fresh yogurt for garnish

*You notice that salt and pepper are not listed. Do not season your stocks so that they may remain a neutral ingredient when it comes to seasoning the actual dish. If you use store bought stock, you will have to take sodium into account. Use vegetable stock for a vegetarian and vegan version.
**With their leaves, if possible.

Cooking

We start with the beef stock. You can either buy the stock, or make it ahead of time. Heat up a tablespoon of oil in a pot and deposit your beef bones. Brown them for about 1-2 minutes on all sides.

The Necromancer from Diablo 2 would make a great soup cook.

The Necromancer from Diablo 2 would make a great soup cook.

Meanwhile, peel your carrot and onion and chop them into chunks. Deposit the chunks into the browned beef and cook until soft. Pour about 5-6 cups of water into the pot. Add thyme, rosemary, garlic, and parsley. Simmer for about two hours, then strain into a container. Either use immediately, refrigerate for up to 3 days, or freeze for long-term storage.

Some of you might be wondering sarcastically if this is a vegetable stock with a bit of beef or a beef stock. Well if you are wondering that, just remember that I'm way Soup Nazier than you are.

Some of you might be wondering sarcastically if this is a vegetable stock with a bit of beef or a beef stock. Well if you are wondering that, just remember that I’m way Soup Nazier than you are.

Now, when you are ready for the borscht, the borscht is ready for you! Chop your onions and carrots into similar sized slices. Saute them in oil until soft in your soup pot.

You can also add meat to your borscht, but I'm only using vegetables here. Beet your meat on your own time.

You can also add meat to your borscht, but I’m only using vegetables here. Beet your meat on your own time.

As the onions and carrots soften, peel and dice your potatoes. When the vegetables in the pot are soft, add your tomato paste. Stir to mix, then add your beef stock, garlic, and bay leaves. Bring to a boil and add the potatoes. Simmer for five minutes.

If you make the soup with chicken instead you can call the soup

If you make the soup with chicken instead you can call the soup “the birds and the beets”.

While you were cooking your vegetables and waiting for the potatoes to cook, you should peel and shred your beets. You can shred by knife like I did, but it takes a longer period of time. Also chop your beet leaves into pieces and shred your cabbage.

If you put your beets into a box that's called beet boxing.

If you put your beets into a box that’s called beet boxing.

Dump all of your vegetables into the soup and simmer until tender, about 20-30 minutes. Salt and pepper to taste and add your vinegar. When the vegetables are as tender as you desire, turn the heat off. Roughly chop 3 tablespoons of parsley and stir them into the soup.

If you eat enough beets it'll turn your piss orange. Romantically speaking, it's like pissing a sunset.

If you eat enough beets it’ll turn your piss orange. Romantically speaking, it’s like pissing a sunset.

Serve the soup hot with a dollop of sour cream or plain yogurt. Garnish with parsley (or more authentically, dill).

Finished borsch. It looks almost like an aborschion in a pot. Probably how the name came to be.

Finished borsch. It looks almost like an aborschion in a pot. Probably how the name came to be.


The Result

Too many beet puns. At this point I'm really beeting a dead borsch.

Too many beet puns. At this point I’m really beeting a dead borsch.

Wow, this soup isn’t bad at all, even without meat. It is slightly sweet, with a rich meaty flavor from the beef stock. Some recipes ask you to add a bit of sugar or honey, but I think that sweetners will definitely push the soup over the edge. Be careful not to spill the soup on your shirt while eating though. That shit’ll never come off. Or, if you do live in an Eastern bloc country, it might feel like you’re being drenched in the blood of revolutionary patriots or something. Wear it outside proudly.

Mushroom Risotto


There aren’t many things in the world that can be brought back from the dead. If you have a plant but neglect to water it for a few months, it’ll most likely be dead. All the water in the world will not bring it back. Luckily, blogs are a far hardier breed of creatures. I’ve never meant to let it die, but here it is, it’s back with just a few swypes at the keyboard! The moral of the story is, if you are an irresponsible human being like me, keep a blog, not a plant (or even worse, a baby).

Anyways, let us start out with something that is both simple and tastes fucking amazing: mushroom risotto. If you ever want to really impress someone who has no idea how to cook without too much effort or money, this is what you will want to make.

Ingredients

Boobies.
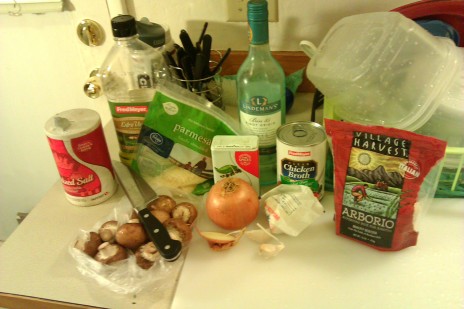
A picture of the ingredients you need, and a lot of inedible stuff you don’t need. For example, that door knob in the back? It will never be used in this dish. At all.

1 cup arborio rice
1 can (or more) of chicken stock*
1/2 pounds mushrooms**
1 medium yellow onion
3 tbsp olive oil
2 cloves garlic
1 tbsp butter
2/3 cup dry white wine
water (optional)
salt
pepper
3 tbsp parmesan cheese

*You can use water on top of the 1 can of chicken stock, or all chicken stock to make this dish extra flavorful.
**Button or brown mushrooms are the common choice. If you are well off you can get fancy with wild mushrooms.

Cooking

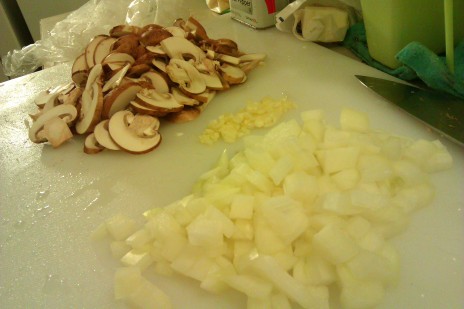
Start by doing a medium (1 cm, 1/3 inch) dice on your onions, mincing your garlic, and slicing your mushrooms. You will be spending a lot of time at the stove later on, so do your prep ahead of time.

Titties.
This type of dish is known in the US as jenyoo-wahhn eye-talian. Which means real Italians might jump off a cliff upon seeing it.

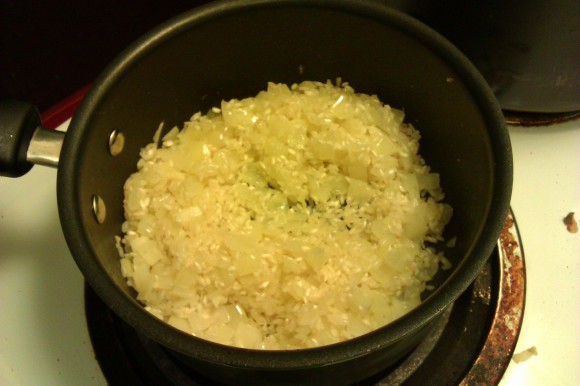
Heat a pot to medium high heat with a tablespoon and a half of olive oil. When the oil is just starting to smoke, add the onion. Cook it for 2-3 minutes until it is translucent but not brown (stir the onion every once in a while to prevent browning). Add garlic and cook for another minute. Add the rice and continue to cook for 2-3 minutes, stirring to avoid browning.

Knockers.
The first Italian style dish I blog about just happens to have rice in it. ASIAN 4 LYFE.

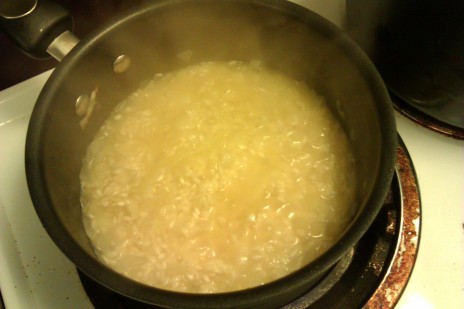
Pour your white wine into the pot. Stir constantly and make sure that the heat is high enough (high heat for electric ranges, medium to medium high on gas stoves) that the liquid is always simmering. Cook until the liquid has almost all evaporated, and add your chicken stock 1/3 of a can at a time, each time stirring until the liquid has almost all evaporated.

Tatas.
Some more Pulitzer quality photos of the action for you.

You will want to repeat the process, using water if you run out of stock, until the rice is cooked through tender and the sauce is creamy. A professional chef can do this in 20 minutes. It took me about 30 minutes, but what matters is that you achieve the right consistency. When the rice is close to finishing (or finished if you don’t feel like multitasking, since the rice can’t be easily overcooked), start sauteing your mushrooms. The mushrooms will take about 5 minutes.

Hooters.
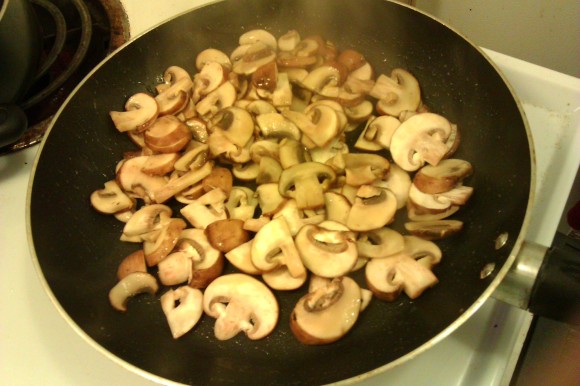
This may look like a lot of mushrooms, but there’s no shroom for error here, so don’t squander them.

Heat a pan with 1 1/2 tablespoons of olive oil and 1 tablespoon of butter on medium-high to high heat. When the butter foams and the foam subsides, add your mushrooms. Toss the mushrooms for about 5 minutes until it is cooked through (make sure that there is no water in the bottom of the pan; if you see water accumulating, turn the heat up). Salt and pepper to taste.

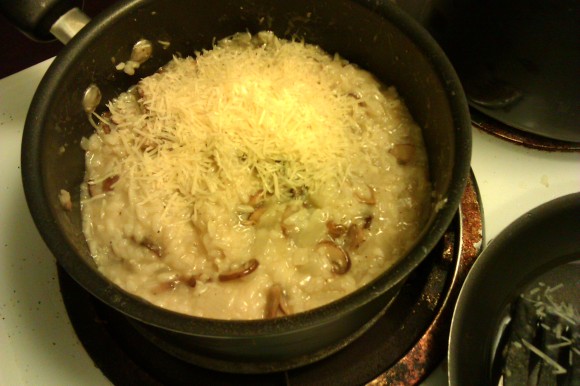
Now that your mushrooms and the risotto are both almost done, dump your mushrooms into your risotto. The reason why you do not cook the mushrooms with the risotto is because mushrooms taste far better when they are sauteed instead of boiled along with the rice. Salt and pepper to taste, taking into consideration the salt content of the chicken stock and the cheese you are about to add. Turn off the heat and stir the parmesan cheese into the risotto. Serve hot.

Assets.
Don’t worry if your cheese is not luminescent like mine is. We can’t all have shitty cameras be angels from the fifth dimension.

Result

Bazookas.
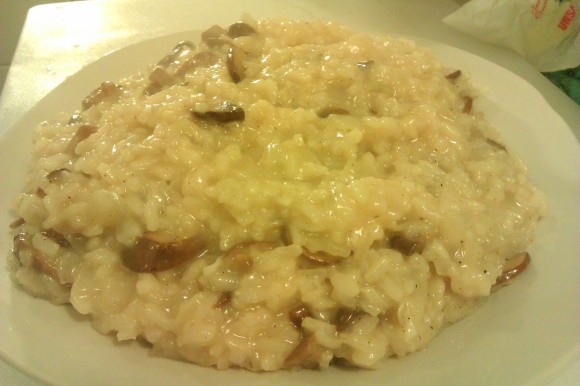
I could tell you about how delicious it is, but you’re probably thinking it looks like it could have come from a bukkake convention. Or maybe only I was thinking of that. But now you’re also thinking of that (if you don’t know what it is, don’t google it).

This is actually a dish I’ve made once before, so I knew it would taste good before I made it for the blog. And it is amazing for how easy it is to make. There is a burst of flavor in every bite, yet the dish isn’t so powerful that you are overwhelmed after only a few bites. It makes for a fantastic main course or a starch component of a bigger course. Oftentimes, simplicity done right is better than complexity done mediocrely.

Until next time, remember that risotto, like pasta, is just shit the Italians took from the Chinese and made better. They were the original bootleggers.

Lettuce Leaf Tacos


One time a coworker at the restaurant I work at told me to stop looking for healthy shit to eat because as a cook, you’ll always end up working with things that are fried or cooked with a lot of butter and cream, and that there’s no point in trying to delay the inevitable. I was too polite to tell him to go fuck himself, but it was the reply that shone most brightly in my mind’s eye.

The point of the story is, here’s one of these things that you can make to delay the inevitable. It’s basically like a taco, with the same ingredients of a taco, but with all the proportions switched around a bit.
Ingredients

If you can’t afford real beef, shoot an email to Taco Bell to try to get their beef substitute recipe. 35% beef but tastes like 100%.

Serves 3-4
Prep Time: ~1.5 hours

Taco: 1-2 heads of green leaf/romaine lettuce*

Fresh Salsa:
4 medium tomatoes
1/2 large red onion
1/2 jalapeno or serrano pepper
1 lime
3 tbsp cilantro
1 tsp salt
1/2 tsp pepper

Steak:

1 lb pan-searable steaks**
1 tsp salt
1/2 tsp pepper
1/2 tsp rosemary
1 tbsp oil
1 tbsp butter

Tortilla:
4 corn tortillas
2 tbsp oil
1 tsp salt

1/2 cup mozzarella, for sprinkling

*I went for green leaf because I like the look and width of the leaves. Romaine will give you a better holding vessel though. You will need to disassemble each head of lettuce and remove the leaves that look like they can be used as taco shells. The rest of the lettuce can be used as a salad for something else. You can get maybe 5-8 good leaves per head of lettuce.
**There are several cuts you can use, make sure to use a tender cut of beef that can be eaten after cooking a short amount of time.

Cooking

The shortest distance between two points is multitasking. Start by pulling out your lettuce heads and your steaks. Leave your steaks out at room temperature for now. Take your lettuce heads apart leaf by leaf and set aside the leaves that are ideal for holding handfuls of diced food. Wash these leaves, gently shake them of excess water, and spread them out somewhere to dry. They will need at least an hour (depending on the humidity where you live) to rid themselves of the moisture.

Leave these leaves resting for now. You don’t want to dilute the flavors of your food by placing them on wet leaves. Lettuce not get a head of ourselves here.

Second task up is the salsa, or pico de gallo. Do a medium dice (about 3/4 cm or 1/3 inch square) on the onions and sit them in some cold water for about five minutes. This will rinse the sting out of the onions (the sulfuric acid) and make the pieces crisp and refreshing. Do the same dice for your tomatoes and hot pepper. Finely chop your cilantro. Drain your onions and mix everything together. Slice your lime in half and squeeze the halves over the salsa. Add salt and pepper, mix again. Cover your salsa and leave it at room temperature to marinate for an hour. Do not refrigerate!

I hope all this herbivore shit isn’t giving you vegetarians false hope. Or maybe it is. I can just imagine your looks of disappointment a few paragraphs down.

Right! Now what is taco without a tortilla component? Preheat your oven to 325F (160C) Take out a stack of about four corn tortillas. Keeping them in a stack, cut them into strips of about 1/2 cm by 3 cm (1/4 inch by 1 inch). Toss them together with oil and sprinkle with salt.

Tortilla Strips, a good name for a latina hooker. If someone reads this and implements this please credit me as “Newbistic from Team Liquid”.

Prepare a sheet pan covered with aluminum foil. Spread the strips out in roughly single layer. Bake for about 12-15 minutes, but peek frequently starting at 10 minutes or so. The chips can burn very quickly. Remove from heat as soon as the chips are starting to turn golden.

Now comes the interesting part. The steaks take about ten minutes in total to prepare, and you want them as warm as possible when you serve. So, wait to prepare them until about 10-15 minutes before you wish to serve.

When you are ready, salt and pepper both sides of your steaks. Pour out oil and butter into your pan on high heat. The butter is for flavor, the oil prevents the butter from burning. When the butter foams up then subsides, place the steaks into the pan. They should start sizzling immediately. If they do not, take your steaks out and wait until the oil is hot enough. Add rosemary into the oil. Cook the steaks on one side until it is browned and about half-way cooked, then flip them over (this takes some experience. At least cook until one side has some brown on it before flipping, try to flip only once). Test the steaks for done-ness by pressing them with your fingertips. If both sides are browned and the steak feels a bit flaccid to your fingertips, it is rare. If it gives a bit of bouncy resistance, it is medium rare. If it gives a lot of resistance, it is well done.

I apologize to any Hindus that might be reading this for the sacrilege. This delicious, succulent, tender, flavorful sacrilege for which I will gladly see a million cows slaugh- err, “slouched” over in peaceful repose in a green meadow. That’s it.

Now, leave your steaks somewhere warm where they can rest for about five minutes before slicing. This step is important because the steaks will be the only warm component to an otherwise cold dish. After five minutes, slice your steaks into cubes.

When you are ready to serve: layer salsa on the bottom of each lettuce leaf, add beef on top, then sprinkle with cheese and tortilla chips. Serve immediately, with rice and beans.

The Result

There are two types of bean consumers: samurai and ninjas. Ninjas are silent but deadly, samurais let their existence known but are just as deadly.

The lettuce leaf is not as structurally sound as a tortilla (especially if you are using a green leaf as opposed to romaine), but it does suffice. It looks (and is) healthier than the standard taco. The tortilla strips on top are instrumental to adding the sufficient amount of crunch to the taco to make the textures interesting. And honestly, it’s not that much more work than a standard taco anyways. Good stuff all round.

Conclusion

The moral of this story is that healthy doesn’t have to mean “tastes like shit”. The next time you are hungrily eying that stick of butter, individually wrapped and ready to consume in the refrigerator, consider expending an hour and a half to make some lettuce leaf tacos instead. Your friends will be impressed. Your mother, doubly so. Your grandmother, well, if her diet included sticks of butter, she’s probably not around anymore. You’ll just have to settle for her rolling over in her grave (if she doesn’t get stuck attempting the roll (“I’m just big boned!”)).

Until next time, don’t show this recipe to your Mexican friends or they might get offended and come after me.

Confit Byaldi


Have you ever looked on Google images for pictures of confit byaldi? They all look somewhat sloppy and lopsided… except for Thomas Keller’s. His is beautiful, neat, and clean, like he chiseled it out of a fucking rainbow. When I started making this dish, I aimed to create something that is also beautiful, neat, and clean. But it turned out sloppy and lopsided like everyone else’s were. I simply wasn’t able to find vegetables of the same width to make the slices layer identically.

The lesson here is that as insane as I might be to try this shit and do it all by hand, master chefs are just slightly more insane in their drive for perfection, and their ability to be damned near perfect.

Confit Byaldi is the version of ratatouille that Thomas Keller invented for the movie “Ratatouille”. It is aesthetically the best looking ratatouille I’ve ever seen, and after having tasted it, it is also the best tasting version too.

Ingredients

Cheap immigrant labor? I’m an immigrant and I did it all for free.

Prep Time: ~4.5 hours

Serves 3-4

Piperade:

1/2 yellow pepper
1/2 red pepper
1/2 orange pepper
~3 medium sized tomatoes (12 oz, or 325g worth)
1 small clove of garlic
1/2 cup onion, finely diced
1 sprig thyme
1 sprig parsley
1/2 bay leaf
2 tablespoons olive oil
salt to taste

Vegetables:

1 medium zuchini
1 medium yellow squash*
1 thin Japanese eggplant**
4-5 roma tomatoes
1 clove garlic
1/8 teaspoon thyme leaves
2 tablespoons olive oil

*I’ve seen fuckers try to sound bourgeois and call them “courgettes”. Don’t be a wanker. Until you’re a chef standing in the kitchen of own restaurant they’re yellow squash.
**You want the long, thin Japanese eggplant, which may be difficult to find depending on where you live. Try to find an eggplant that is as similar in diameter to the squash and zuchini as you can.

Vinaigrette:

1 tablespoon of piperade
1 tablespoon olive oil
1 teaspoon balsamic vinegar
salt
pepper

You will also need: A good knife or a mandolin. Mandolin is highly recommended for those who aren’t insane.

Assembly

Preparation starts with the piperade. Cut your peppers in half lengthwise. Remove the seeds and ribs from one half of each pepper. Lay them skins side up onto a baking sheet lined with aluminum foil and bake at 450F (232C) for fifteen minutes.

Making this dish was like running my own sweat shop, except I’m the only worker.

Meanwhile, bring a pot of water to boil. Make small x-shaped incisions on the bottom of your tomatoes and drop them into the boiling water for 15 seconds. This will allow you to easily peel your tomatoes. Now remove the tomatoes from the water and peel them. Cut the tomatoes in half width-wise. Use a spoon, remove the seeds from each tomato over a plastic container. You want to keep the seeds, pulp, and juice that drips out. Finely chop your peeled and deseeded tomatoes.

Show those vegetables no mercy.

Peel your clove of garlic and mince that. Cut your onion in half and finely chop that also. Group the onions and garlic together and keep your tomatoes separate. At this point, your peppers may be done. Take them out of the oven and let them cool.

On the stove, pour two tablespoons of olive oil into a pan over medium heat. Dump your onions and garlic into the pan and cook for about 8 minutes. Let the onions and garlic soften but do not brown them (this means stirring the vegetables every 30 seconds or so). After 8 minutes, dump in your tomatoes and herbs. Pour in the juice from de-seeding the tomatoes but do not let any seeds get into the piperade. Keep the herbs in sprig form. You will be removing them later.

Ratatouille is French, but confit byaldi was invented by an American. USA! USA! USA!

Cook the tomatoes for about 10 minutes to soften, but do not brown. At this point in time the peppers should be cool enough to touch. Peel the peppers and finely dice them as well. Dump the peppers into the piperade after 10 minutes is up. Simmer for about another 5-10 minutes, until there is no excess moisture. Remove the herbs and add salt to taste.

Hundreds of years in a French kitchen one cook said to the other “What the fuck is this mush?” Then the other cook said “Mush? No. We will give it a fancy name… say “piperade” or something, and everyone will love it.”

Now you can start on the vegetables! You want to slice all the vegetables into 1/16th inch (or 1.5 millimeter) slices. You will need approximately 2/3 of a zuchini, eggplant, and yellow squash, and 4-5 tomatoes. Do try to slice them as thinly as possible, it gives a nice texture and appearance. Place your eggplant slices in a small container with lightly salted water to prevent them from browning.

Recipe invented by white people, vegetables picked by brown people, dish processed by yellow people. It’s an international collaboration.

Now, spread your piperade (reserve a few tablespoons for the vinaigrette) all over the bottom of a baking dish. Down the center, lay down 8 alternating slices of vegetables, approximately 1/4 inch apart.

The beginning of tedium. An activity so dull even my camera couldn’t maintain focus.

Continue laying down rounds of vegetables until your entire pan is covered in vegetables. Pre-heat your oven to 275F (135C). In a separate container, whisk together a clove of minced garlic, two tablespoons of olive oil, the thyme, and salt and pepper to taste (about 1/2 teaspoon of each for me). Spread this mixture over the vegetables.

You could try first placing the vegetables vertically, then pushing over the last slice so they fall like dominoes. I’ve never tried it.

Cover the baking pan tightly with aluminum foil and bake for about 2 hours, or until the vegetables are tender (poke them with a knife. If the knife runs through easily, the vegetables are tender). At the end of 2 hours, uncover the pan and bake for half an hour more. Remove from oven.

But in the movie it took them only 3 seconds to make! Pixar you bastard!

As the dish cools, whisk together all the ingredients for the vinaigrette. Equal portions of olive oil to piperade, and 1 teaspoon of balsamic vinegar for every tablespoon of oil. You want about 2 tablespoons of vinaigrette per portion of ratatouille. Serve at room temperature or refrigerate for up to 2 days.

The Result

The vegetarian version of escargot.

Why would you ever spend so much time making this? I dunno. It is pretty good though. The vegetables are very soft, in a melt-in-your-mouth kind of way. There is a ton of compressed flavor within the thin slices of vegetables. I would even venture to say that this is probably as good as it will ever get for vegetarians. But for the rest of us, there is MEAT. Yes, I could go for a nice steak right about now.

Conclusion

The making of this dish was inspired by immaculate beauty. The result was… not quite the same? In the similar way in which God made man and man tried to make man but ended up with Frankenstein. How many Frankensteins will I have to make until I can make man? I don’t know, but keep your eyes peeled for a flood of monsters, each slightly better looking than the last.

Fun with Eggs


…Specifically, eggs of the chicken. Most people will agree that chicken periods are considerably more palatable than human periods. Furthermore, they are cheaper. Requests for human egg donors in the classified section of newspapers often offer thousands of dollars for a single egg.

This blog entry isn’t as much about egg dishes as it is about what you can do with eggs. The first dish is a broccoli and tomato salad with home made mayonnaise. The second dish is a cherry clafoutis. Both dishes use eggs in a supporting role, but the eggs are critical enough that the dishes will not work without them.

If you hate eggs, this is not the blog for you. And shame on you for hating on eggs.

Module 1: Tomato and Broccoli Salad

Hullaballoo

What came first, the chicken or the egg? The chicken, of course. Eggs can’t come.

Prep Time: ~30 minutes
Serves 4-6

Ingredients

1 lb broccoli
1 lb tomatoes
1/3 cup grated parmesan
1 tbsp salt

Mayonnaise

1 egg yolk
1/2 cup dijon mustard
2/3 cup oil*
1/2 tbsp salt**
1/4 tbsp pepper (white pepper if you want consistent coloring)
1 1/2 tbsp wine vinegar or lemon juice

*Typically you will want to use a neutral tasting oil. I used half olive oil and half vegetable (sunflower) oil. Pure olive oil will have too strong a flavor for making mayonnaise.

**I tend to under-salt my dressings and my food in general. You may wish to up this to a full tablespoon for the final salad.

Cooking

Bring about two quarts (2 liters) of water to a boil in a pot with 1 tablespoon of salt. Meanwhile, cut your broccoli into bite-sized pieces.

I bet you can’t spot the egg in this picture.

Blanch the broccoli (which means to cook something briefly in boiling water) for about a minute, keeping the heat on high. When you first put the broccoli into the water, it may cause the water to stop boiling. The water should come back to a rolling boil before the minute is up. This will quickly cook the broccoli until it is slightly tender, but the broccoli should still retain some of its crispiness.

Just kidding, there weren’t any eggs in the previous picture.

Lift your broccoli out of the water and let it cool in a colander. Do not dump the hot water yet. As the broccoli cool, you can start on your mayonnaise. Mayonnaise is quite easy to make, but also easy to screw up if you do not pay attention. Crack open an egg and separate the yolk and the white. Discard the white. Deposit the egg yolk in a medium sized bowl. Add the mustard. Mustard is a good emulsifier, which means it will help bind the oil to the egg yolk.

Salmonella? Never heard of her. Is she hot?

Whisk the mustard and the egg yolk together while holding the bowl over the hot water. You will want to bring the two to room temperature without overcooking the eggs, so check the bottom of your bowl every now and then to make sure that it is not too hot. Oftentimes mayonnaise recipes will tell you to use “room temperature eggs”, and this is the best and safest way to bring eggs to room temperature. Simply leaving egg outside for a few hours will “age” the egg significantly and it will be considerably less fresh than if you used the method described here.

Once the yolk and mustard mixture is well whisked and at room temperature, you are ready to make mayonnaise. Have your oil ready at hand and add ONLY a few drops to the yolk. The key to mayonnaise is to start adding oil very slowly. If you add oil too quickly, the mayonnaise will never form and you will have to restart.

The mayonnaise starts out yellow and becomes paler over time. As a Chinese living in the United States, that’s the story of my life right there.

Whisk the few drops of oil into the yolk until it is smooth and uniform. Add a bit more oil this time, and whisk the oil in. Continue to add oil, increasing the increments each time, and whisk the oil completely into the mayonnaise before continuing on.

Whisk until all the oil has been incorporated. Now you can season the mayonnaise. Add salt and pepper, and vinegar or lemon juice for acidity.

The primordial ooze of French cuisine

The time for salad assembly is now. Cut your tomatoes into bite-sized pieces. Throw in parmesan and toss your vegetables together with the mayonnaise (add as much as you need). Serve right away, or refrigerate and serve chilled.

Vegetables just aren’t the same without a ton of fat drenched all over it.

Module 2: Cherry Clafoutis

A custard had sex with a flan once upon a time. The flan got pregnant and gave birth to the clafoutis.

Adapted from Julia Child’s recipe
Prep time: ~1 hour
Serves 3-4
Makes 1 8-inch cast-iron pan

2 cups ripe cherries*
5/6 cup milk (or part milk, part cream)
1/4 cup granulated sugar
1/2 tbsp vanilla eggstract
1/4 tsp salt
1/2 cup all-purpose flour
1 egg + 1 egg yolk
butter, for buttering pan
1 tbsp powdered sugar

You will also need: a vessel which is both stove-top and oven-safe, such as a cast iron pan.

*The traditional dessert can be made with either apricots or cherries (pitted or not). I used unpitted bing cherries, which allegedly gives a more intense flavor. You can either pit the cherries, or use pitted canned cherries. Drain the canned cherries of syrup before use.

Cooking

A clafoutis is like a mix between a flan and a custard. It can be eaten either as a dessert or for breakfast. It is fast and easy to make. First, pre-heat your oven to 350F (175C) sift your flour into a bowl. Add eggs to the flour and mix together into a thick, yellowy batter.

Chopsticks, so named because they are excellent tools for chopping objects. If you disagree, it means your kungfu is weak.

Add sugar, mix thoroughly again, then add the milk slowly while mixing to avoid lumps. Add salt and finally vanilla extract. You should end up with a very thin batter.

If you stir 13 times counter-clockwise using your feet while doing a handstand underneath a ladder with a black cat as witness, a unicorn will appear and grant you one wish.

Prepare your cherries however you want them to end up in the clafoutis. Butter your pan. Turn the heat to medium on the stove top and place your pan on the stove. Pour a thin layer of batter into the pan, just enough to cover the bottom. Heat the bottom just enough for the layer to thicken slightly, then pull the pan from the heat. Place all of your cherries into the pan in a single layer and pour the rest of the batter into the pan.

This clafoutis just got clafruity.

Stick the clafoutis into the oven and bake for about 45 minutes. Check in at about 40 minutes. Once the edges are puffed and brown, and a knife stuck into the center comes out clean, the clafoutis is ready. Dust with powdered sugar and serve at room temperature.

Don’t forget to warn people about the cherry pits when you serve this to them, unless you secretly hate them.

Conclusion

Aren’t eggs useful? And not even in the impregnation/reproduction way either. Even when they are not the centerpiece, they serve as critical instruments that bind many dishes and sauces together. I like eggs, and so should you. Eggs are there to serve. They exist for your nourishment. Instead of beating your children or your wife, consider beating your eggs instead. You will discover that the results are much more desirable.